Arriving in Australia
We arrived in Sydney, Australia with an initial plan of getting jobs as soon as possible and therefore had working visas. We knew Australia was expensive, but it did really hit us hard when we arrived and started searching for accommodation. What was £20 a night in Vietnam for a 5* hotel, became £60 a night for a less than ideal youth hostel. We also didn't want to just stay in one place for our time in Australia, but to travel around and explore. I wouldn't say we panicked but we had to re-evaluate our plans to achieve what we wanted from our travels.
Why we chose a Van to explore Australia
1. Flexibility and Freedom
Having a van allowed us to be completely free and go wherever we want, whenever we wanted, without being tied down to bus and train schedules. After we did some planning on where we actually wanted to explore, the most popular sights all seemed off the beaten track and therefore a van was a must!
2. Cost-Effectiveness
We had our funds available for New Zealand still and therefore, we thought we could dip into this pot of savings for the initial cost of buying the van and doing it up. The van will then serve as both transport and accommodation, helping save on hotel or hostel costs. We also cooked all our meals in the van which saved us lots, rather than going out every night. In the long run, it proved incredibly cost-effective, because we sold the van after our trip and therefore accommodation was completely free in our eyes. All we had to pay for was fuel, food and experiences.
3. Accessibility to Remote Locations
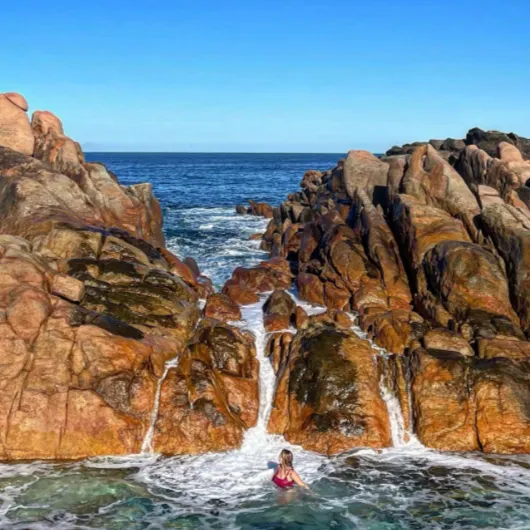
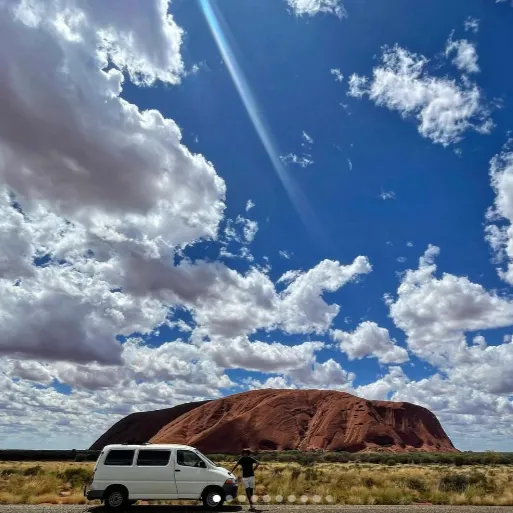
Australia is vast, with many remote and stunning destinations that are not accessible by public transport. Having a van allowed us to reach places like Uluru, Lucky Beach and national parks, where public transportation options are very limited or non-existent.
4. Comfort and Convenience
Travelling in our van offered a sense of being at home. We had our belongings with us, could sleep in our own bed and made everything nice and cosy. It also allowed us to carry more gear with us like a surfboard, fishing gear and hiking equipment.
5. Adventure and Experience
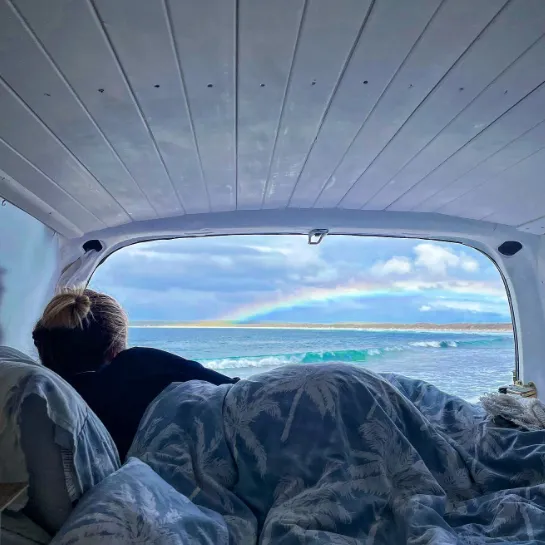
Our van life experience added a real sense of Australian adventure. Visiting beautiful campsites and waking up to new views every day was one of the most exciting parts of our travels. Also, being able to change plans on a whim made it really interesting.. It allowed for detours in case of floods or to visit interesting places that we may not have considered initially.
6. The Camping Community
The van life community in Australia is super fun and friendly. At every campsite, we'd often meet people doing exactly what we were doing and see them again along our journey at other different spots. You're guaranteed to share tips, stories and even travel all together for a while. It definitely enhanced our trip and created amazing memories.
7. Meeting the Locals
Living in a van allowed us to meet new people, especially locals. We 100% feel like we've immersed ourselves in the Australian culture and lifestyle. We visited small towns, chatted to locals and experienced part of the country beyond the typical tourist trail.
Researching & Buying Our Van
As soon as we decided to go down the van route, we had to work out:
- Budget
- Type of van (make, model, mileage, fuel efficiency, converted already or a shell etc.)
- What documents we need (insurance, ownership, MOT etc.)
1. Budget
Budgeting was a critical aspect of our van plan. We began with a thorough research of the used van market so that we knew the vehicle's market value and could then negotiate a best price. We also we in the off-season, so everyone was selling while we were buying, which meant we could negotiate further. We set a realistic budget to cover the purchase of the van, potential conversion materials, and any unexpected expenses.
Budget Breakdown:
- Van Purchase: AUD$6000 (£3,000)
- Conversion Materials: AUD$2,500 (£1,500)
- Tools and Equipment: Maggie found a dog sitting job for 3 weeks with free accommodation and we asked if we could use their tools, which they said yes to
- Vehicle Service, Insurance, Documents & Breakdown Cover: AUD$600 (£300)
We tracked every expense meticulously, ensuring we stayed within our limits while allowing some flexibility for unforeseen costs.
2. Type of Van
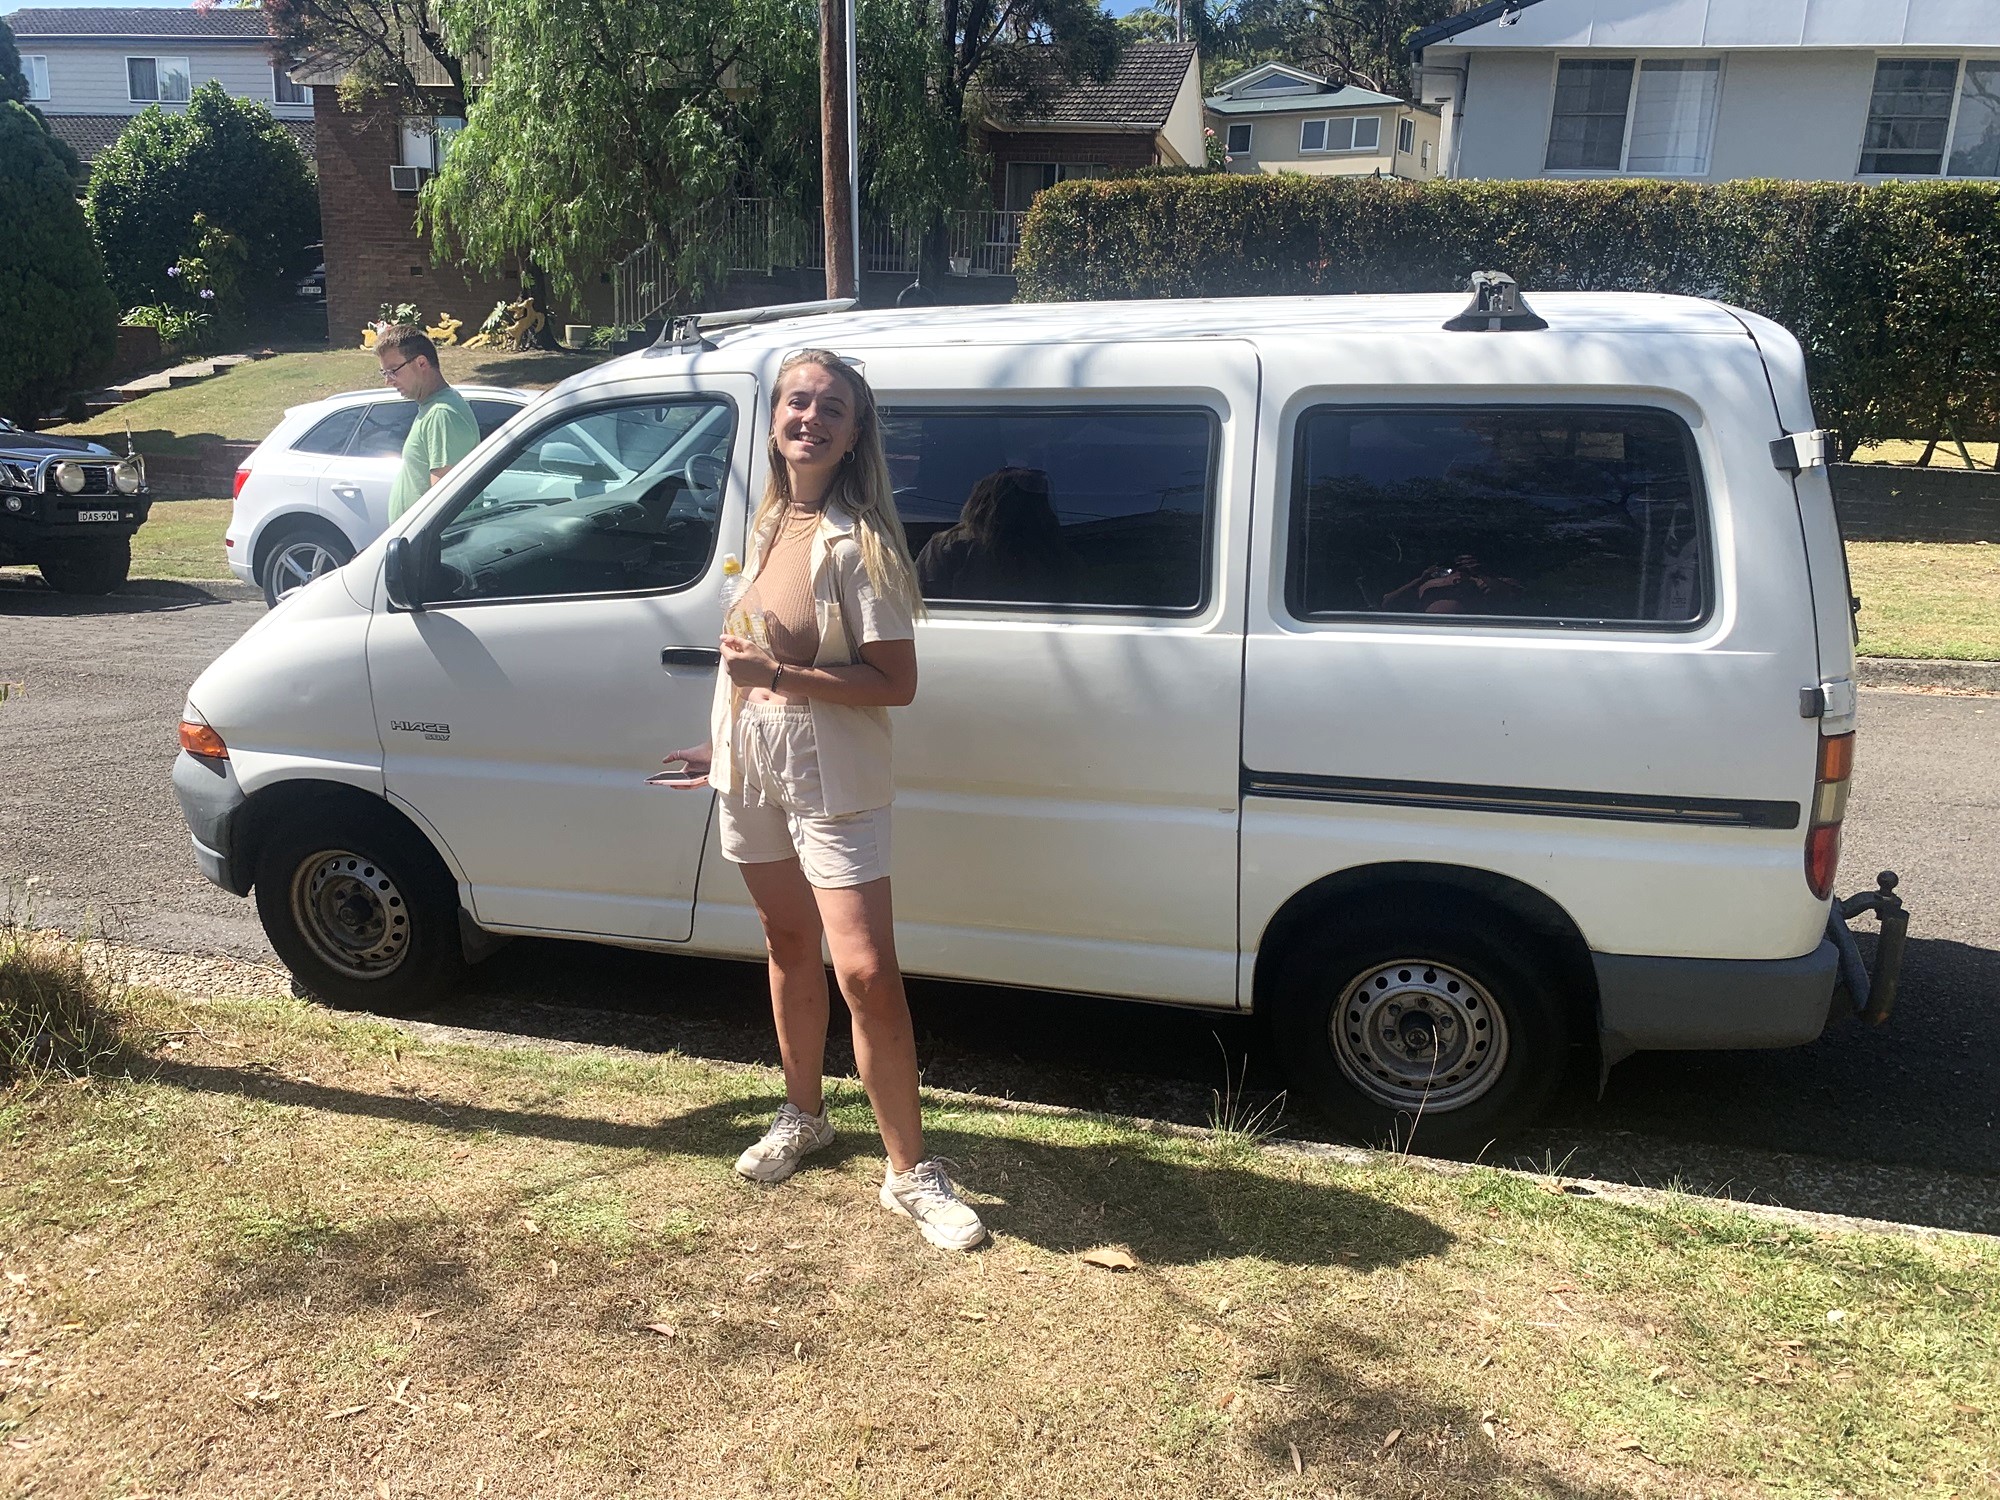
With our budget worked out, we began the process of researching vans and considering factors like make, model, age, reliability, fuel efficiency, and ease of conversion. After comparing several options, we settled on trying to find a Toyota Hiace due to its robust build and reputation for reliability. Every garage we spoke to, recommended a Toyota for doing a massive trip like we had planned, saying "a Toyota will go forever".
Maggie and I searched Gumtree Australia, Facebook Marketplace, joined Facebook groups, eBay and finally we found one going for AUD$5,500 on gumtree a short bus ride away in Sydney. We messaged and organised to meet ASAP because vans get sold so quickly.
Key Considerations:
- Pre-Purchase Check: We were advised from pretty much every person we spoke to, to get a "pre-purchase check". This meant asking the seller to drive their van to an independent garage we had chosen, so that a mechanic could check the vehicle. Since this was just after New Years, it was so tough to find a garage willing to book us in such short notice. However, after about 30 calls, we found one called Dee Why Auto Clinic.
- Registration of Ownership Documents: Ensuring the seller of the van was in fact the owner of the vehicle.
- Size and Layout: The Hiace offered ample space for a comfortable living area without being too large to handle.
Here is a very useful link that we used, to ensure we did everything needed to buy a second-hand car in Sydney.
3. After Buying The Van
You can call up the government and ask what is needed. Although, the person who we bought from seemed to know it all and listed it out for us.
- Part B Registration Transfer Details: Make sure you get this bit of paper which is on the back of the Certificate of Registration.
- Transfer the Vehicle Registration: The seller will need to complete a Note of Disposal (NOD) before you can transfer the vehicle into your name. Alternatively, (what we had to do) was visit a Service NSW Centre with proof of purchase to transfer the vehicle registration in person. This cost AUD$35 (£20) for the registration and AUD$150 (£85) for tax that was payable on purchase of the van.
- Fully Comprehensive Insurance: We went with NRMA insurance, they were so helpful and I'd really recommend calling them to get the insurance correct. They advised that we should go through all the steps with them to make sure our insurance wasn't void because we were living in the van and converting it. This equalled AUD$125 / month (£70 / month), cancel anytime.
- NRMA Roadside Assistance: I'd recommend this for sure!
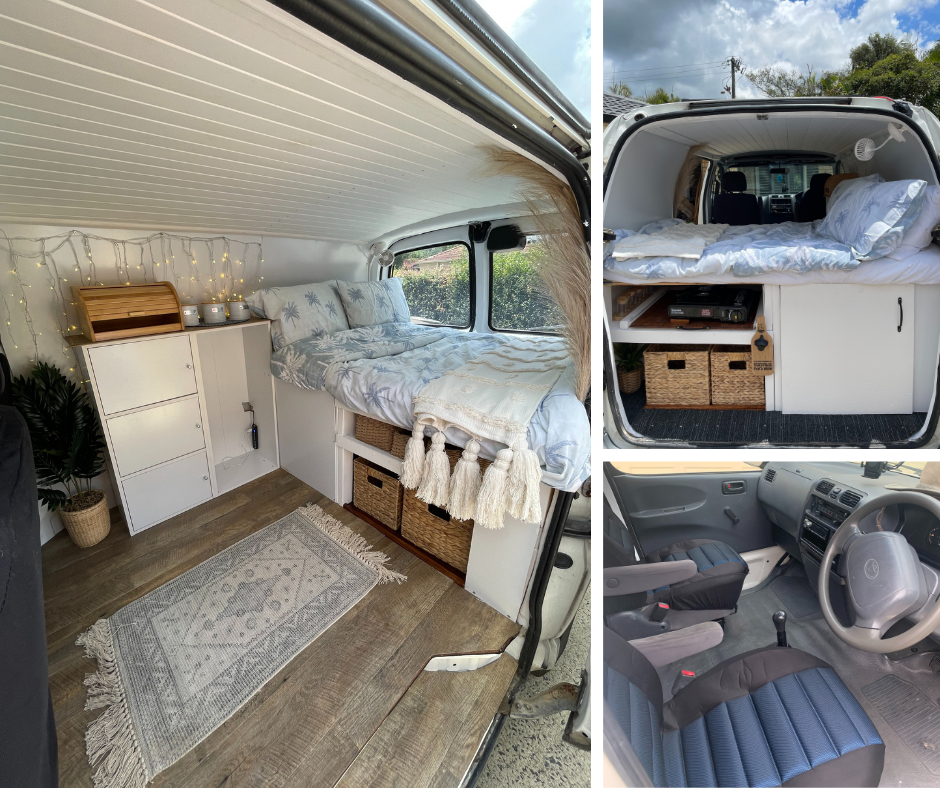
Design Ideas - Functional yet Stylish
Designing the interior was super fun! We wanted it to be functional (since we were going to live inside the van for months), but also stylish!
Functional Design Elements:
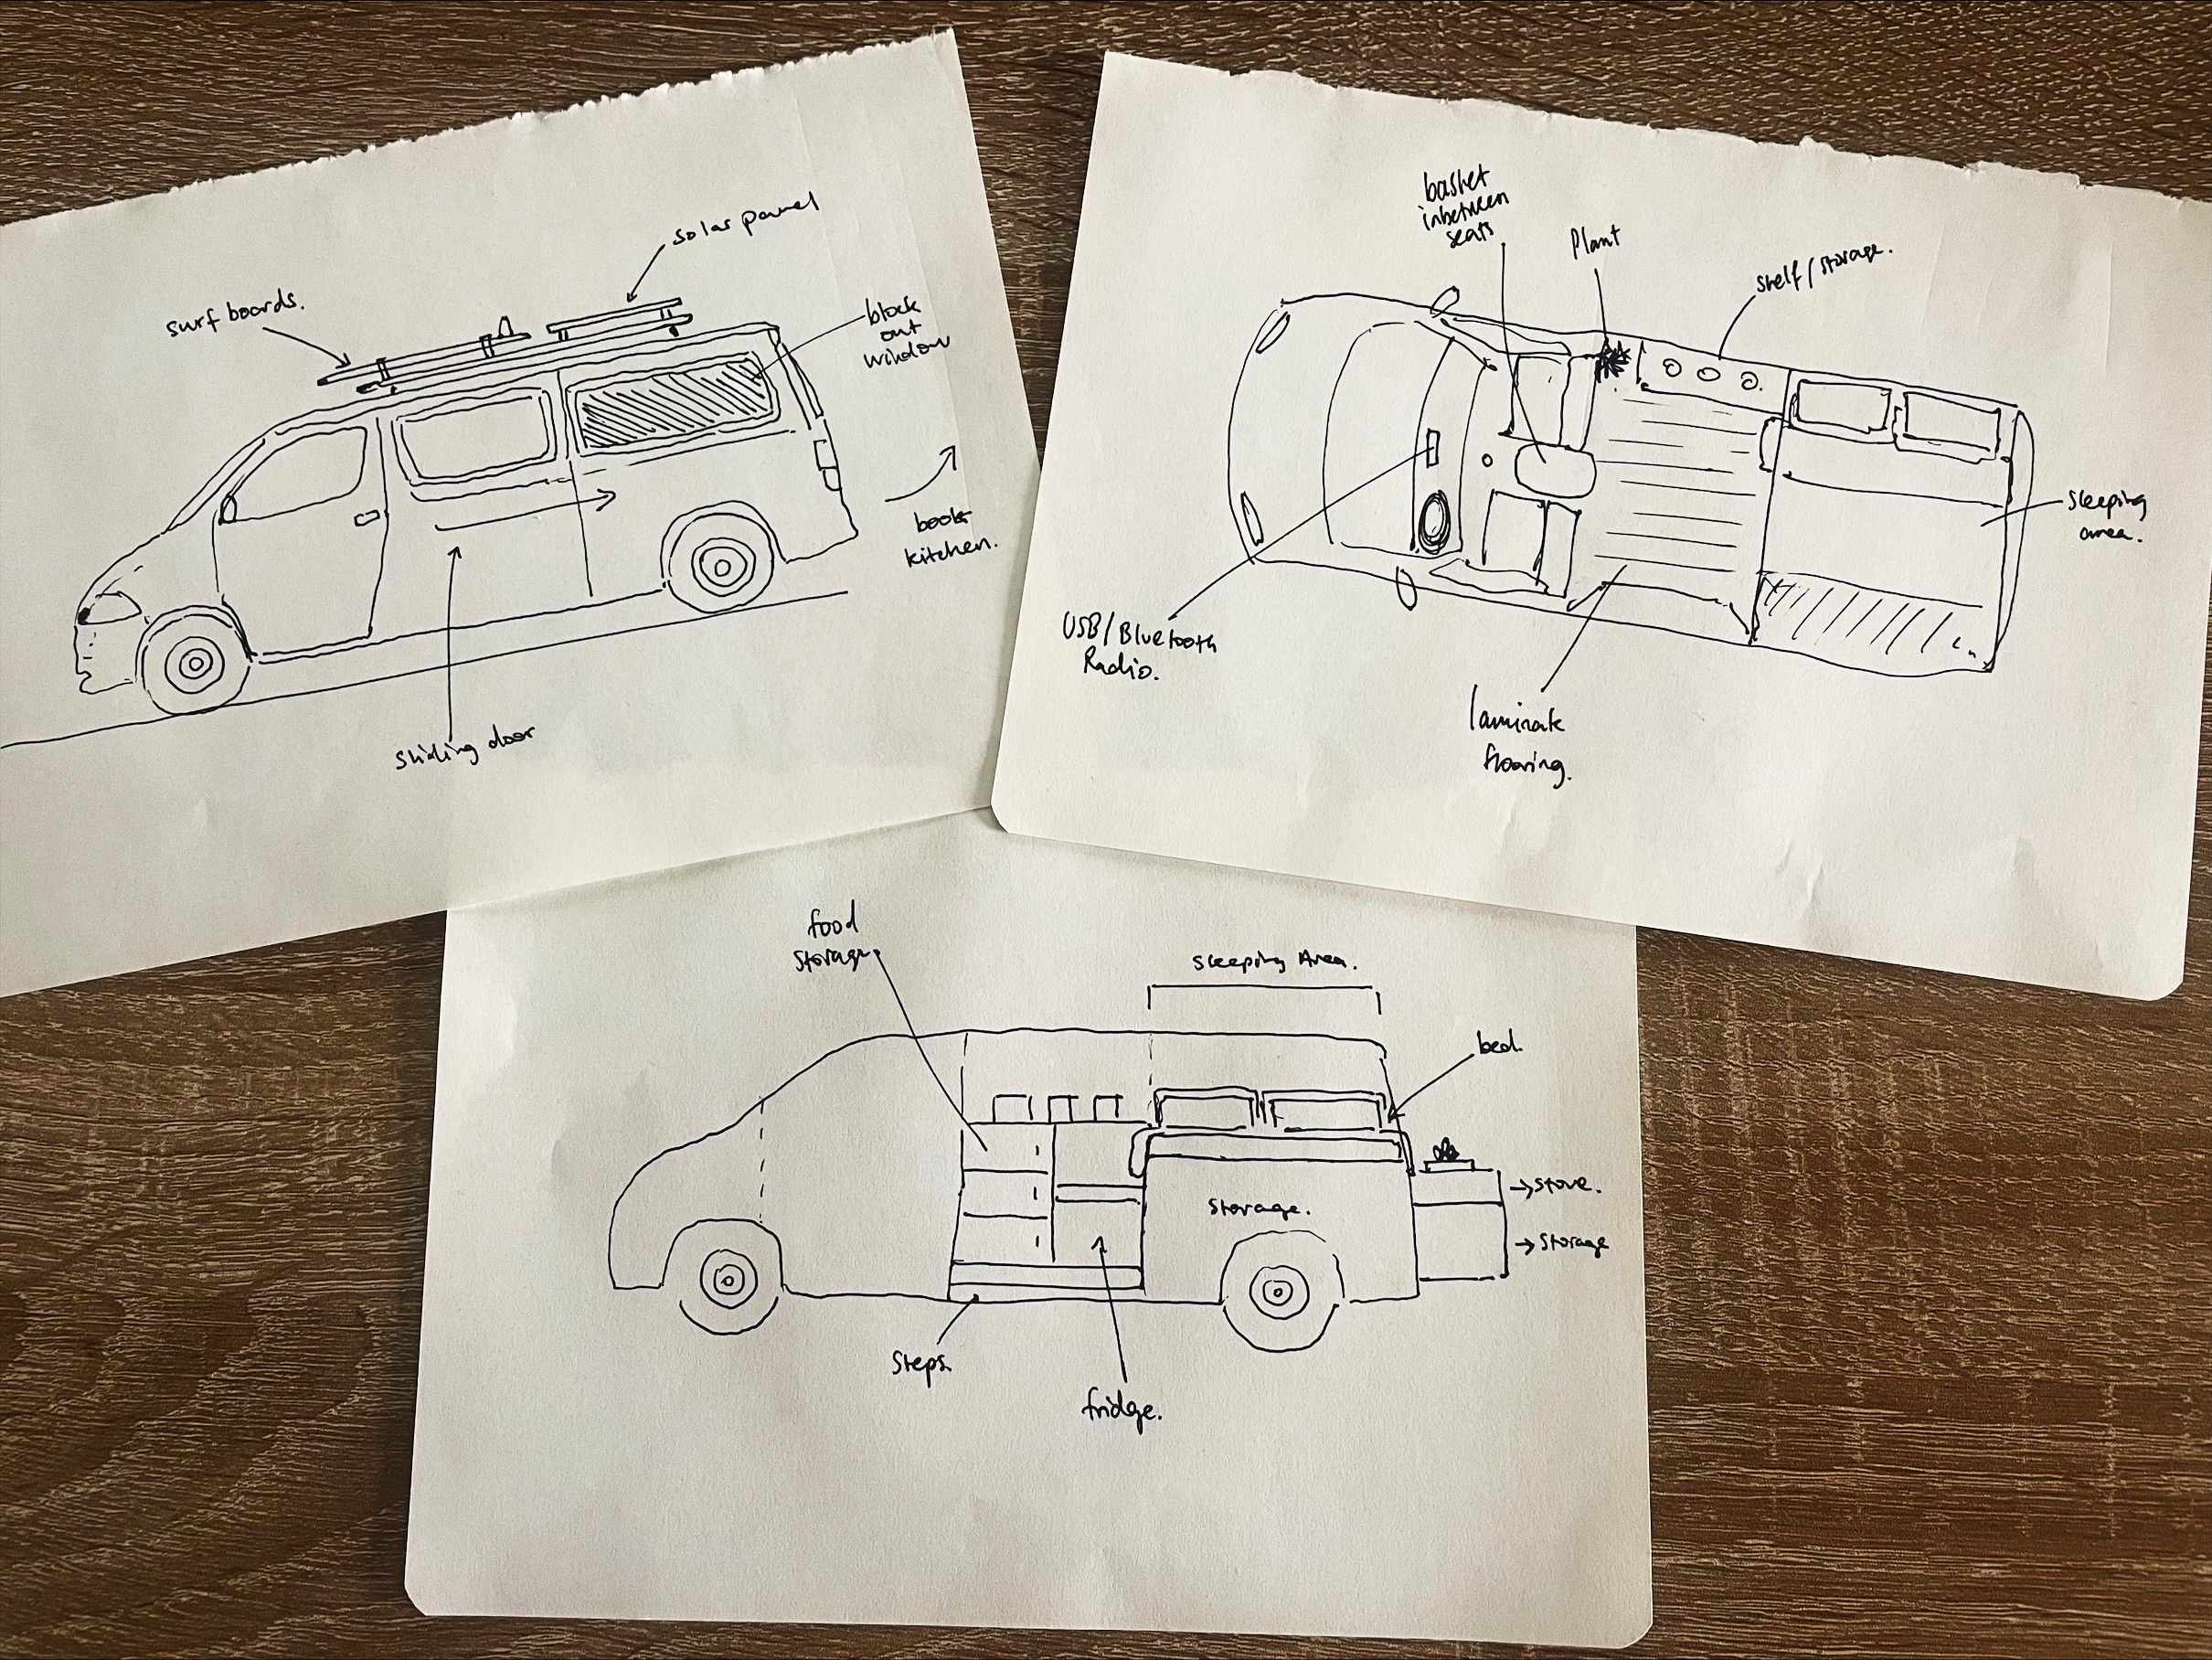
- Sleeping Area: A double bed required to fit both of us.
- Cooking Area: A compact yet fully equipped kitchen with a stove, washing bowls, storage and mini-fridge.
- Storage: Clever storage to fit all our clothes and equipment.
- Bathroom: No bathroom, just a portable toilet for emergencies only.
Small Touches:
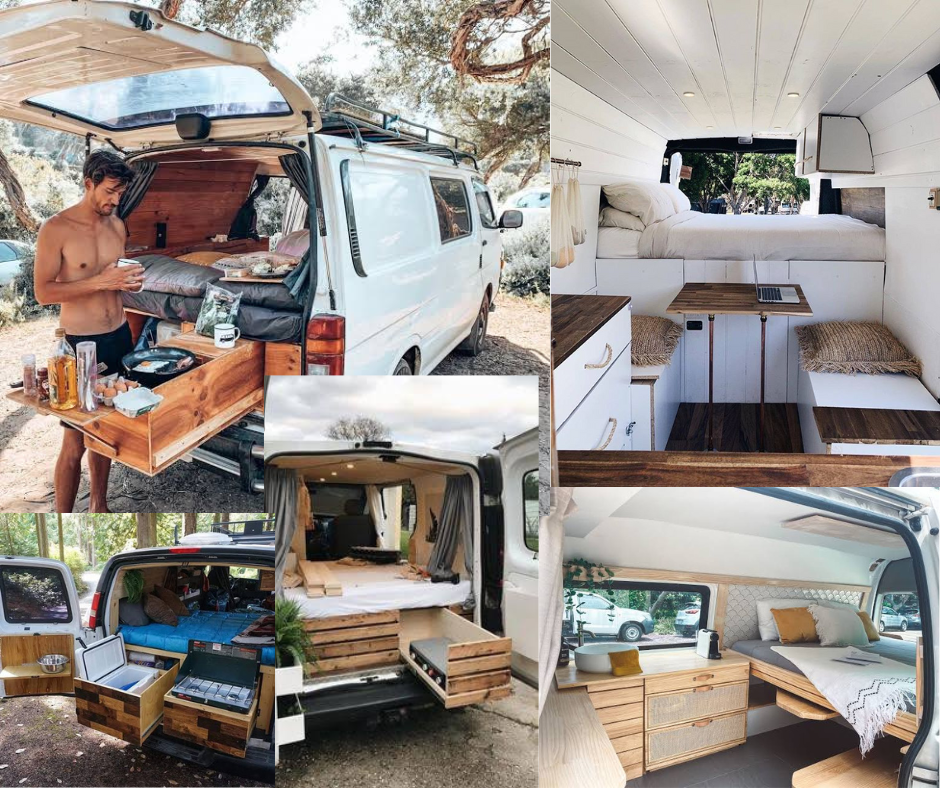
- Colour: Light colours to make the space feel larger and cooler.
- Décor: Cosy blankets, fairy lights, plant, laminate flooring and tablet holder (to watch movies).
- Materials: Wood & Timber (cheaper and easy to cut and fix onto the bodywork).
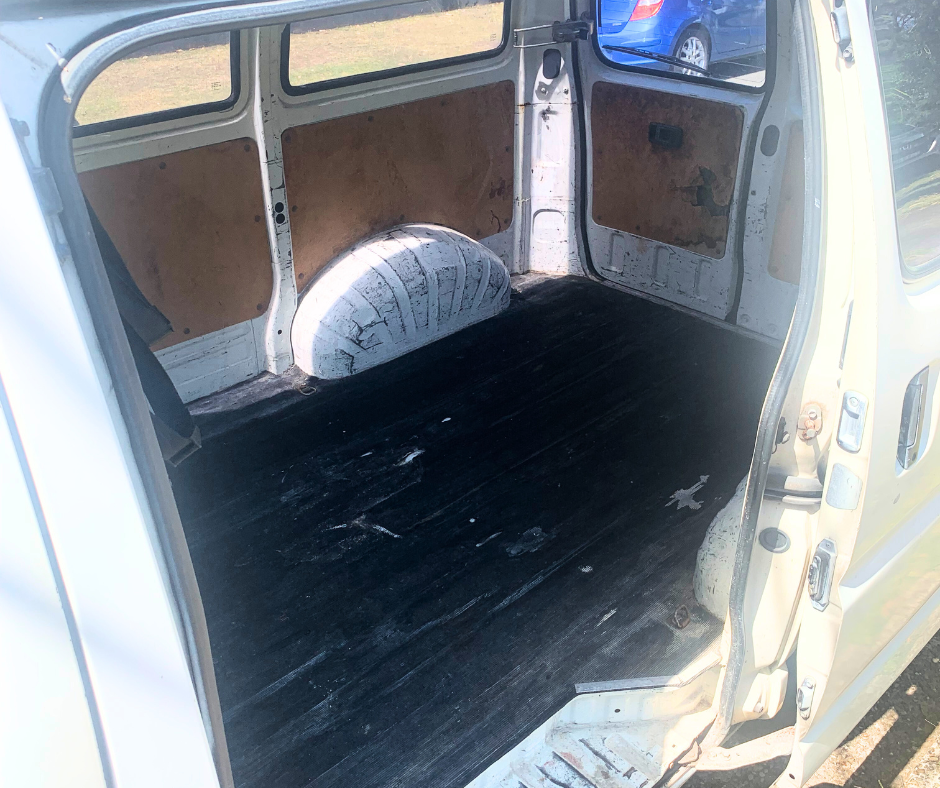
Building Steps
The building phase was both challenging and rewarding. We tackled each aspect of the build systematically, learning a lot along the way.
Step-by-Step Process:
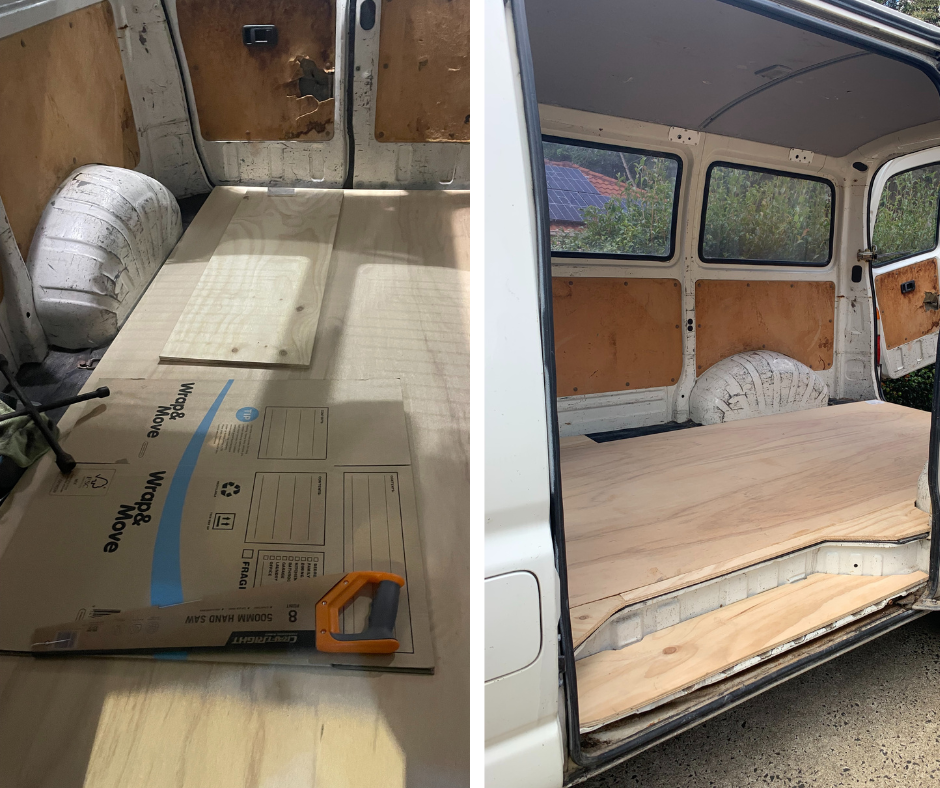
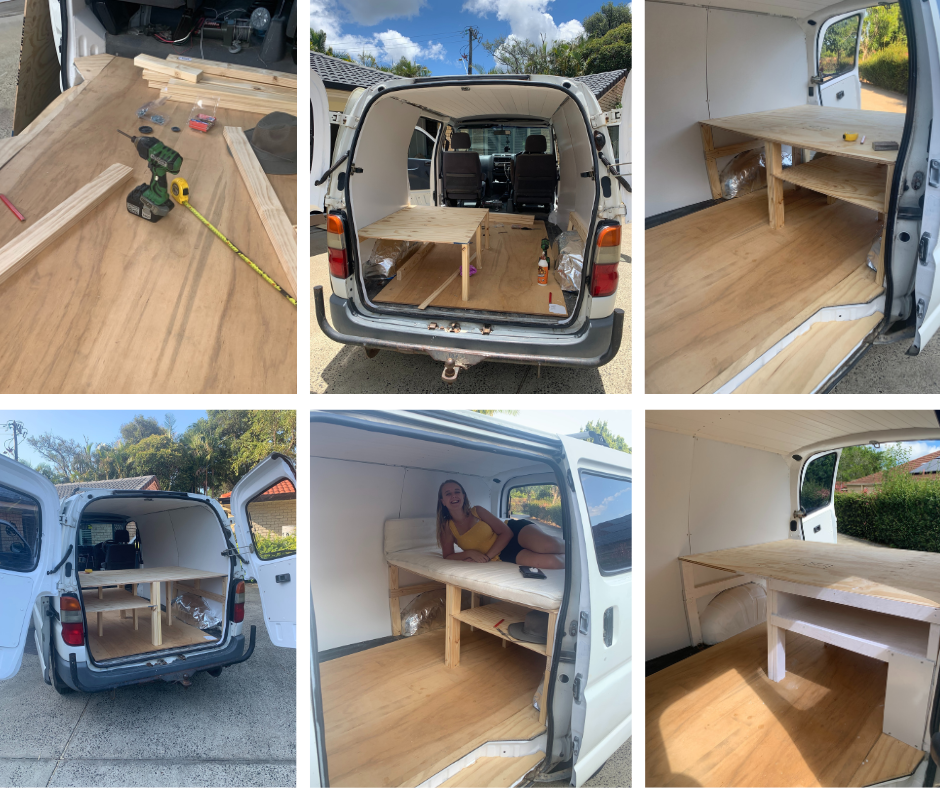
1. Stripping the Van: Removing the old interior to start with a clean slate.
2. Flooring: Laying down a large sheet of ply for the base. We chose do this as we'll need to drill bed legs into the floor as well as other bits and we needed a flat surface to do so.
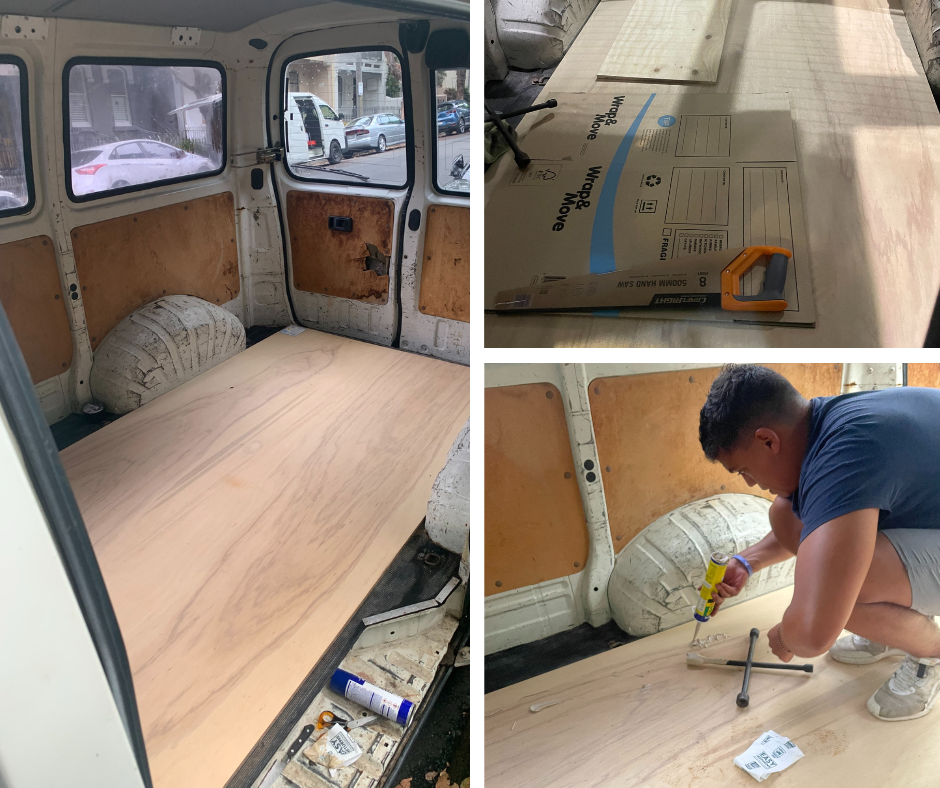
3. Side-Step: We had to buy an extra bit of plywood to fit the stair bit. To cut this out, we also bought a wood saw and some cardboard to draw out a stencil.
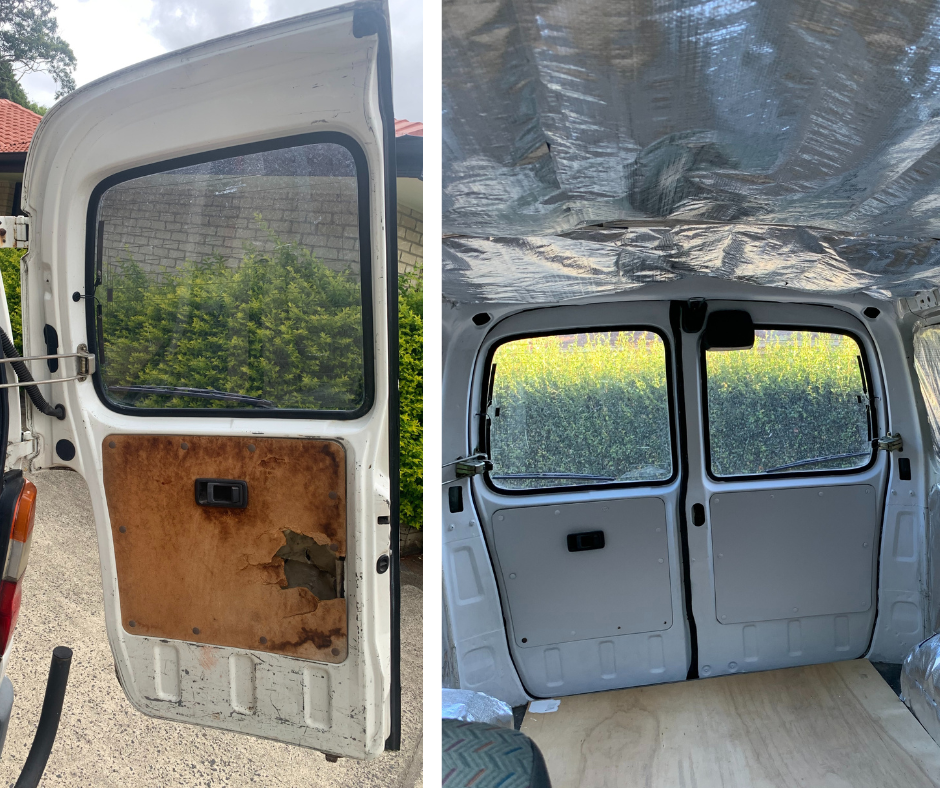
4. Black-Out Windows: So that we could sleep, we decided to black out the whole of the right hand side of the van. We'd leave the slide door window clear and only black out the rear left hand window. We used cardboard again to stencil the window and then cut out the black material to stick onto the window.

5. Insulation: Installing insulation to keep the van cool in the Australian heat. We didn't realise we'd also need it to keep us warm in the Australian cold, later in our trip.

5. Painting: Just a touch up of white paint to create a clean, white space. Here's a before and after:
6. White Walls: We had to get this absolutely right and finally chose 3mm white ply, to drill into the chassis of the van using these special "self-drill" metal screws.
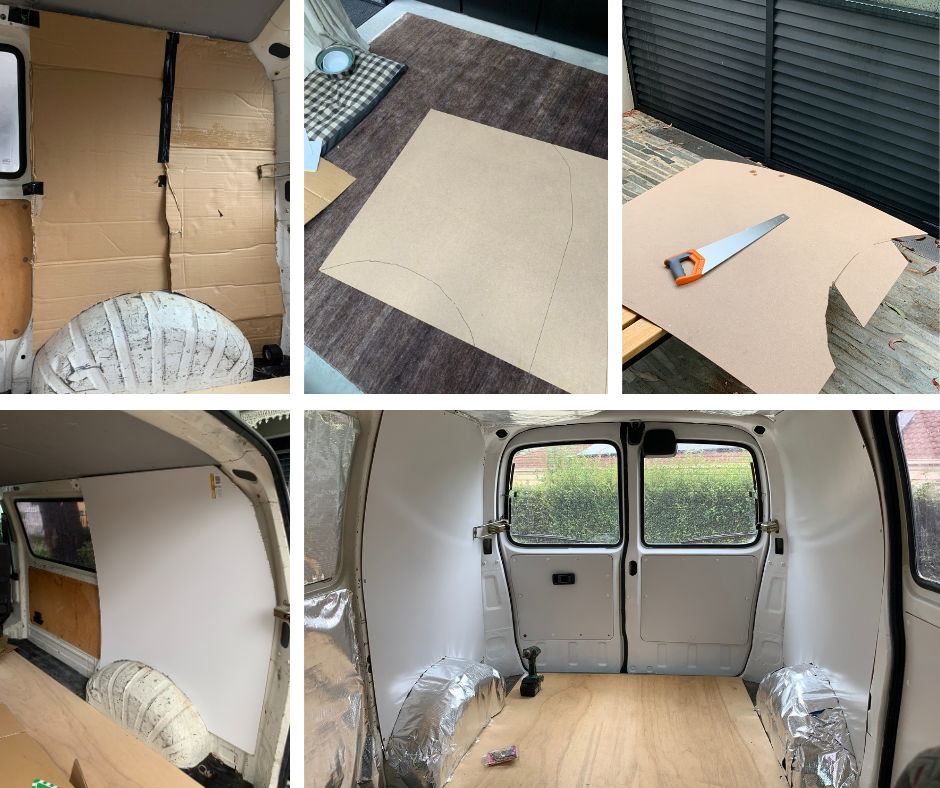
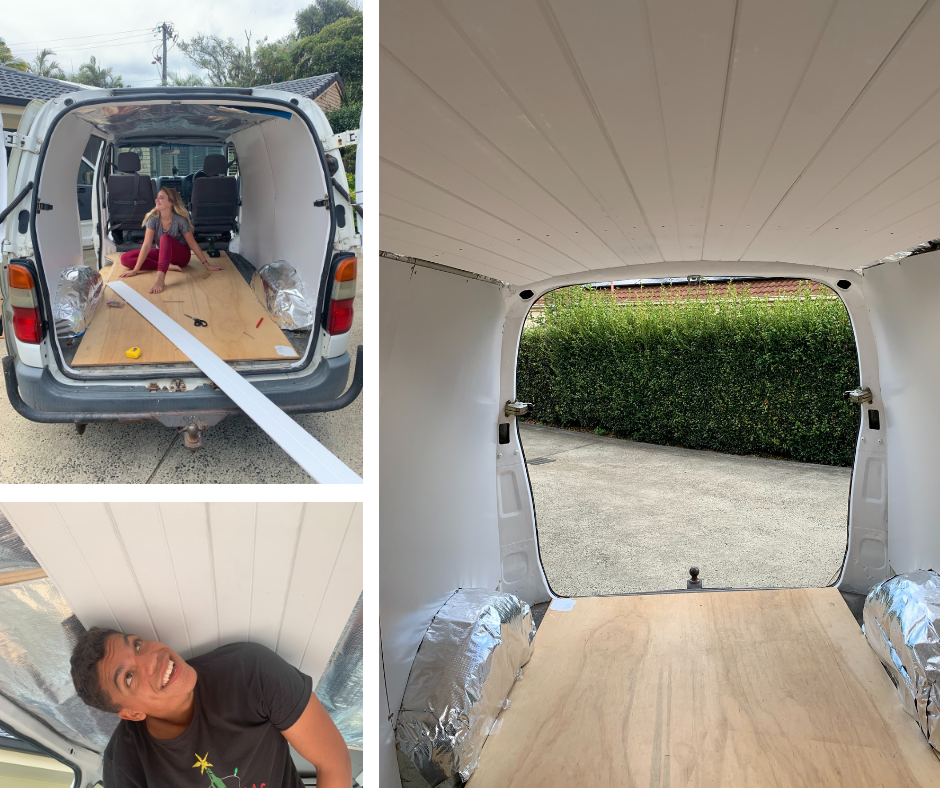
7. White Ceiling Panels: We chose to drill in 3 x batons into the ceiling of the van. We could then drill all the panels lengthways down the way like so:
8. The Bed: We needed storage underneath the bed. Therefore, we made the bed quite high so that we could have the stove under the bed too.
8. Solar Panel:
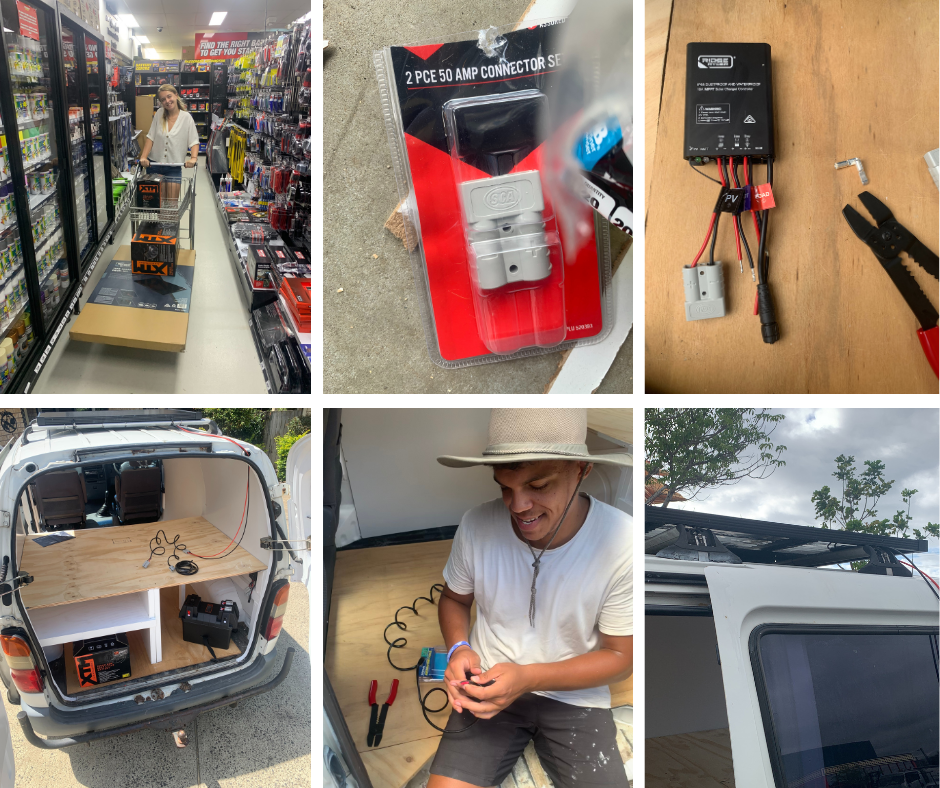
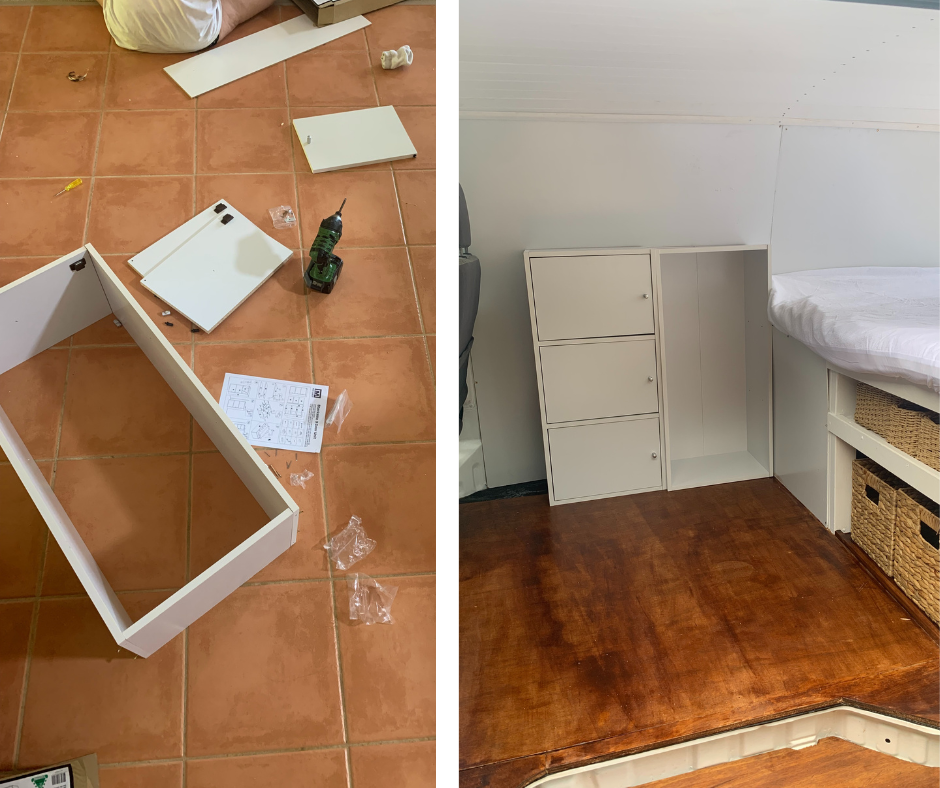
8. Kitchen Storage: We also needed kitchen storage to keep our dry foods, cutlery, plates, cups and mini fridge in. We found this perfect cabinet in Bunnings, built it and screwed it into the floor.
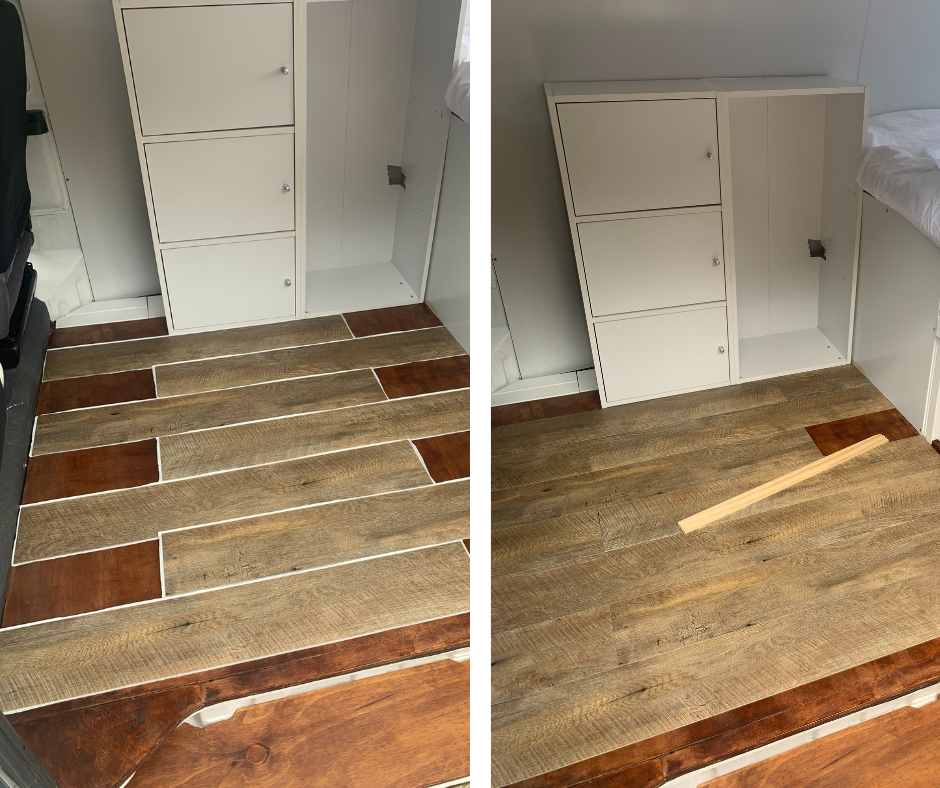
9. Laminate Flooring: The varnish didn't work out unfortunately. So we had to buy a laminate floor pack from Bunnings to cover the above finish.
10. Finishing Touches: Here are a few finishing touches thanks to Maggie for making it look so great. I definitely couldn't have chosen these bits for the final touch.
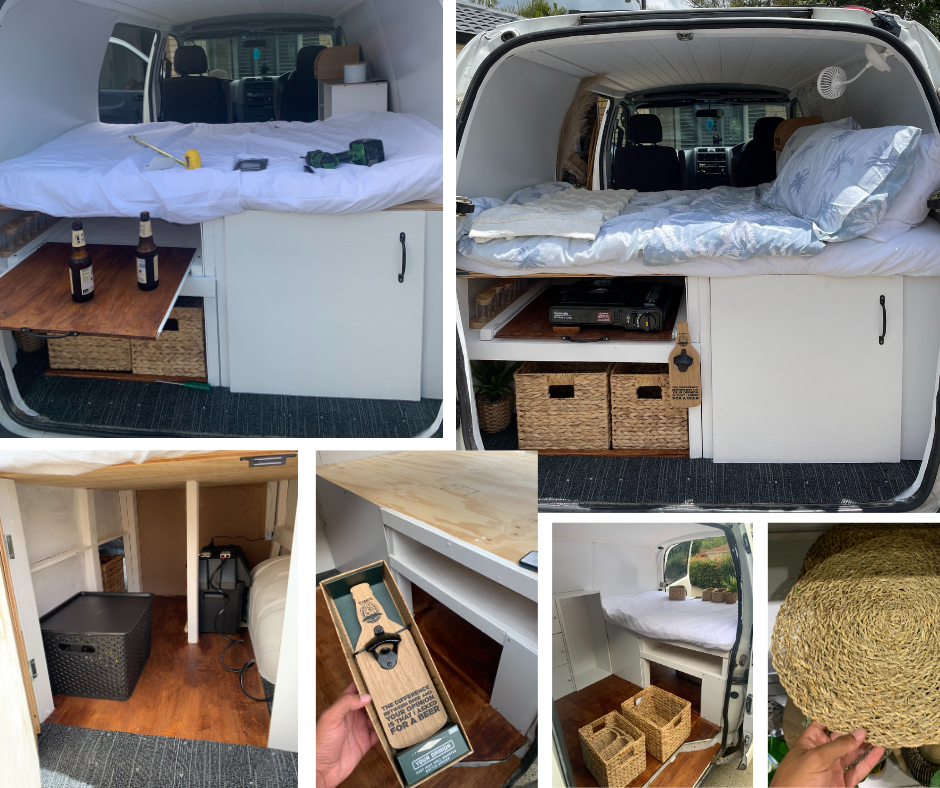
10. We're Done!!
Essential Tips
Here are some essential tips we gathered from our van conversion experience:
- Plan Thoroughly: Detailed planning can save time and money in the long run.
- Stay Flexible: Be prepared to adapt your plans as you encounter obstacles.
- Prioritize Safety: Ensure all modifications are secure and safe for travel.
- Invest in Quality: Use high-quality materials and tools to avoid frequent repairs.
- Enjoy the Process: Embrace the journey and enjoy the transformation of your van.
Converting our 1999 Toyota Hiace into a mobile home was an unforgettable adventure that prepared us for an amazing journey across Australia. We hope our experience and insights inspire you to embark on your own van conversion project. Happy travels!